











Table of Contents
- 1 Step-by-Step SEO Website Audit: Find and Fix Issues Slashing Your Rankings
- 1.1 1. Define audit scope, objectives, and KPIs
- 1.2 2. Crawl the site and build a page inventory
- 1.3 3. Indexability and canonicalization diagnosis
- 1.4 4. Rendering, JavaScript and structured data
- 1.5 5. Core Web Vitals, performance and mobile optimization
- 1.6 6. On-page content quality, keyword mapping, and cannibalization
- 1.7 7. Internal linking, site architecture and UX signals
- 1.8 8. Backlink profile, toxic links and off-page diagnostics
- 1.9 9. Prioritize fixes, assign tasks, and measure impact
- 1.10 1. Define audit scope, objectives, and KPIs
- 1.11 3. Indexability and canonicalization diagnosis
Step-by-Step SEO Website Audit: Find and Fix Issues Slashing Your Rankings
If your organic traffic slipped and your audit returns a wall of noisy alerts, this step-by-step seo website audit shows how to cut through the noise and identify the real causes of ranking drops. You will get a repeatable workflow: crawl setup, indexability checks, performance and Core Web Vitals fixes, content and internal-link remediation, and backlink triage, plus exact exports, code snippets, and commands you can hand to engineers and writers. The guide is tool-aware, showing which reports to run in Screaming Frog, Google Search Console, and Lighthouse, how to prioritize by impact versus effort, and how to track results with Ranklytics.
1. Define audit scope, objectives, and KPIs
Start precise, not broad. The single biggest time sink in an seo website audit is fuzzy scope: teams crawl everything, generate thousands of issues, then stall on prioritization. Pick the smallest scope that answers the business question you actually need to solve — you can expand later.
Decide scope: options and real tradeoffs
- Full site audit: catches systemic problems but multiplies data. Use when migrations, penalties, or broad traffic drops are suspected.
- Subdomain or directory: faster, less noisy. Use for launches, landing pages, or product-area regressions (for example
example.com/blog). - Landing-page set: targeted and quick. Best for campaign troubleshooting and Core Web Vitals fixes on high-converting pages.
Tradeoff to accept. A full-site crawl surfaces low-priority noise; a narrow audit can miss cross-site canonical or link equity problems. Choose scope based on the hypothesis: if you suspect indexation problems, include sitemaps and top-level directories; if you suspect content gaps, focus on business-critical sections and their keyword clusters.
Define objectives and the KPIs that map to outcomes
- Primary KPI (pick one): organic clicks (GSC) for affected pages or tracked keyword positions in Ranklytics — this keeps the audit outcome-focused.
- Secondary KPIs: impressions, CTR, Core Web Vitals (LCP < 2.5s, CLS < 0.1), and GA4 conversions tied to the pages under audit.
- Operational KPIs: number of actionable issues identified, estimated engineering hours, and time-to-deploy for high-priority fixes.
Measurement window and baseline matter. Use a 90-day baseline for seasonally stable sites; use 12 months if traffic is seasonal. Record the exact dates and exports you will compare — GSC Performance CSV, Screaming Frog crawl, and PageSpeed snapshots — so post-fix comparisons are apples-to-apples.
Audit brief: what to deliver and who needs access
Practical rule: limit the brief to a single page with clear asks. Share it before any crawl so stakeholders can flag areas to include or exclude.
GSC, GA4, server logs, repo), Known changes in last 90 days, Expected rollout owners (engineering, content, SEO).Concrete example: Audit example.com/blog after a product launch: scope is the blog subdirectory, baseline is the 90 days before launch, primary KPI is organic clicks for the launch landing post and three pillar pages, secondary KPIs are LCP and signups tracked in GA4. Resulting deliverables: Screaming Frog internal HTML export, GSC Performance CSV, and PageSpeed snapshots for the five highest-traffic posts.
Judgment call most teams miss. Do not track more than 3 primary KPIs for a single audit. Too many KPIs diffuse responsibility and make acceptance criteria fuzzy. If stakeholders insist on broader measurement, split them into a second, follow-up audit with its own brief.
Next consideration: lock the scope, set baseline export dates, and request GSC, GA4, and server-log access now. That clears the blockers before you run the first crawl and saves days of back-and-forth.

2. Crawl the site and build a page inventory
Core point: a single, shallow crawl is noise—two reconciled inventories are diagnostic. Run a link-following crawl to discover the site graph, then a render-aware crawl to catch JavaScript-rendered pages, and reconcile both against sitemaps, server logs, and Google Search Console.
Practical crawl setup
Screaming Frog settings to start with: set the user-agent to a recognizable string, increase Max URI Length to 8192, enable the JavaScript renderer for pages that rely on client rendering, and keep Respect robots.txt enabled unless you have stakeholder approval to bypass it for auditing. Save these exports after the run: Internal HTML, Response Codes, Canonicals, and All Inlinks.
- Secondary crawl: run a render-capable crawler (for example Sitebulb or a headless Chrome script) to validate what Google actually sees; use it only for high-priority directories because it is slow.
- Server logs: export raw server logs (at least 30 days) and map 200 OK hits to your crawl list to reveal true crawl frequency and orphan pages.
- GSC tie-in: download Coverage and Performance URL exports from Google Search Console for the same baseline window and plan to join on URL (exact match) to find indexation mismatches.
Tradeoff to accept: JavaScript rendering catches dynamic content but multiplies crawl time and false positives (e.g., analytics-only scripts). If you need speed, do a link-based crawl first, then render only the pages that show as indexable but have missing content in GSC or Lighthouse failures.
Concrete example: a SaaS site audit I ran found 3,200 HTML URLs on a standard crawl but the render crawl discovered 450 additional pages that load content via an API call. After matching to GSC, 120 of those render-only pages were indexed and receiving impressions—these were driving low-quality snippets and needed canonical fixes. The dual-crawl approach surfaced them; a single crawl would have missed the indexation signal.
Judgment call most teams miss: do not treat the crawler output as ground truth. Server logs show what Googlebot actually requests; sitemaps show what you claim; GSC shows what Google indexes. The intersection of those sets is where you find real problems, not in the union.
| Column | Purpose |
|---|---|
| URL | Primary key for joins across crawls, GSC, and logs |
| Status Code | Identify 4xx/5xx and redirect chains |
| Indexed (GSC) | Quick flag for indexation mismatch |
| Renderable | True if content present after JS render |
| Organic Clicks | Prioritize by traffic impact |
Build a single canonical inventory CSV by joining crawls, logs, and GSC. Add columns for priorityscore (organic clicks * position sensitivity) and fixestimate_hours to drive prioritization.
Next consideration: after you have the reconciled inventory, mark the rows where GSC impressions exist but renderable content is missing—those are immediate indexability tickets to assign to engineering.
3. Indexability and canonicalization diagnosis
Plain fact: most indexation surprises come from conflicting signals — a page being reachable but marked noindex, a canonical pointing at a redirect, or sitemaps listing URLs different from what the site actually serves. Treat indexability as an alignment problem: every layer the crawler sees must agree on which URL should exist and be indexed.
Fast diagnostic commands to run first
Run these checks immediately to separate genuine indexation problems from noise. Use the live responses you get from the origin server; GSC can be delayed and crawlers sometimes cache old responses.
curl -I -L https://example.com/page | grep X-Robots-Tag— confirms header-level noindex for non-HTML assets.curl -s https://example.com/page | grep -i rel=canonical— verifies the HTML canonical the page outputs without rendering JS.- Use the Google Search Console URL Inspection live test for the same URL and compare the indexed URL, last crawl, and rendered HTML.
- Export the sitemap.xml you submit in GSC and spot-check that the canonical URLs in your crawl match the sitemap entries.
Common mismatch patterns and what they mean. If the server responds 200 but the page has , you have a canonical conflict — Google may pick the canonical you prefer, but it can ignore it if other signals point elsewhere. If the canonical targets a redirect or a different host (for example an HTTP URL after an HTTPS migration), indexing will be unstable until you fix the target.
Concrete example: After an HTTPS migration I audited, internal links were updated but the CMS still emitted canonicals to HTTP. Pages returned 200 yet GSC showed many as non-indexed; the fix was twofold — update the canonical template in the CMS to the HTTPS host and re-issue the sitemap. Within a week GSC confirmed reindexing and impressions recovered for affected pages.
Practical tradeoff: aggressive canonicalization simplifies index signals but risks hiding real variants. If you canonicalize dozens of product pages to a single hub to avoid thin content, you may kill long-tail impressions and intent matches. Prefer targeted consolidation backed by analytics (impressions and clicks) rather than blanket rules.
Priority rule: fix server- and header-level directives first (status codes, X-Robots-Tag), then canonical tags and sitemaps, then internal links and hreflang. Misalignment at the server level cannot be overridden cleanly by HTML alone.
noindex in headers and meta; 2) Ensure rel=canonical targets a non-redirect, same-protocol URL; 3) Align sitemap URLs with canonicals; 4) If multilingual, validate hreflang link-rel blocks. After changes, request reindexing in GSC and monitor impressions for the next 7–14 days. Use Google Search Central for canonical and header reference and record each change in your audit ticketing system (for example add the updated file, PR link, and GSC reindex request ID).
4. Rendering, JavaScript and structured data
Direct point: JavaScript-driven pages and broken structured data are frequent, high-impact failures in a practical seo website audit—fixes here restore visibility and rich snippets faster than chasing low-value meta tags.
Fast diagnostics that separate rendering failures from content problems
Start with three reproducible checks: run a live URL test in Google Search Console and compare the rendered HTML snapshot to the raw server response; run lighthouse (or PageSpeed Insights) to capture the post-render DOM; and paste the final page URL into the Rich Results Test to list schema errors. These three outputs together tell you whether missing content or bad markup are caused by client-side rendering, resource loading failures, or invalid JSON-LD.
- GSC live test: Inspect URL -> View Tested Page -> Compare HTML with Page Source
- Lighthouse CLI:
lighthouse https://example.com/page --output=json --chrome-flags=--headlessand inspectartifacts.HTMLElementfor missing nodes - Rich Results Test: run to capture schema parsing errors and line numbers
Practical tradeoff: dynamic rendering or pre-rendering solves indexation quickly but creates two delivery paths for the same URL. That speeds recovery but increases maintenance and can create user-crawler divergence. Prefer server-side rendering for long-term reliability; use dynamic rendering as a controlled, short-term remediation while engineering implements SSR.
Concrete example: An ecommerce audit found product prices and aggregateRating injected by client JS, so rich results and price snippets disappeared. The short-term patch was a pre-rendered endpoint that served the product HTML and JSON-LD to crawlers only; the long-term fix was incremental SSR for product pages. Within 10 days the Rich Results Test showed valid Product schema and GSC impressions for product-rich snippets returned.
Fix patterns and snippets: If you cannot ship SSR immediately, build a crawler-safe JSON-LD block rendered server-side. Example Product JSON-LD to insert into the server response: {@context:https://schema.org,@type:Product,name:Example Product,sku:EX-123,offers:{@type:Offer,price:79.00,priceCurrency:USD,availability:https://schema.org/InStock}} Keep the JSON-LD minimal and authoritative; avoid client-side mutations of the same properties.
- When to request engineering work: pages indexed but missing critical DOM nodes or schema in GSC rendered HTML
- When to task content or frontend devs: schema present but invalid or missing required fields per Rich Results Test
If a page looks fine in the browser but fails in the GSC rendered HTML, treat that as a crawler-timeout or resource-blocking problem, not a content quality problem.
5. Core Web Vitals, performance and mobile optimization
Direct point: Poor real-user performance compounds other SEO problems — slow pages lower crawl efficiency, reduce user engagement, and make content that would otherwise rank underperform. Treat Core Web Vitals and mobile UX as amplifiers, not isolated features to toggle on and off.
Measure first, then pick the low-hanging fruit
Start with field and lab data. Pull CrUX data for your high-traffic landing pages, then run targeted Lighthouse or WebPageTest runs for the same URLs to capture render waterfalls and HAR files. Field metrics tell you what users actually experience; lab runs show the bottlenecks you can fix.
- Baseline exports: pull CrUX (BigQuery or PageSpeed Insights API), WebPageTest HAR, and Lighthouse JSON for 10–20 priority pages.
- Map problems to symptoms: heavy images = long LCP; layout shifts = CLS from injected banners or fonts; long tasks = JavaScript blocking interactivity.
- Prioritize: rank fixes by organic traffic exposure and by how likely the change is to improve field metrics within 2–4 weeks.
Concrete example: On a product category page I audited, a third-party reviews widget added a 600ms main-thread task and blocked the hero image request. Removing the widget from initial load and preloading the hero image cut perceived load time by more than half and restored click-throughs on the category card. The business impact was measurable within one week in both GSC impressions and session-level engagement.
High-impact fixes with practical constraints
- Images: implement
srcsetandsizes, serve AVIF/WebP where supported, and generate progressive JPEG fallbacks; use a CDN with on-the-fly resizing. Tradeoff: aggressive lossy compression can reduce conversion rates—validate image quality with A/B tests. - Fonts: use
rel=preloadfor key fonts withas=font crossoriginandfont-display: swap; avoid preloading every weight. Limitation: preloading too many fonts increases contention for the main thread. - Third-party scripts: move noncritical tags to
deferor load them after interaction; consider tag-manager async loading or a server-side tag proxy. Consideration: some vendors require early access to the DOM—test functional regressions in staging. - Critical CSS and server hints: extract above-the-fold CSS and inline it for key templates; use
rel=preloadsparingly for hero images and critical fonts to reduce render-blocking requests.
Focus fixes where users land and convert. Improving one high-traffic page's LCP often beats small wins across hundreds of low-traffic pages.
Judgment call most teams miss: Synthetic score chasing is expensive and distracting. If lab scores and field metrics conflict, prioritize actions that move the field metrics. Real users and crawl behavior drive SEO outcomes; Lighthouse is a diagnostic tool, not a goal.
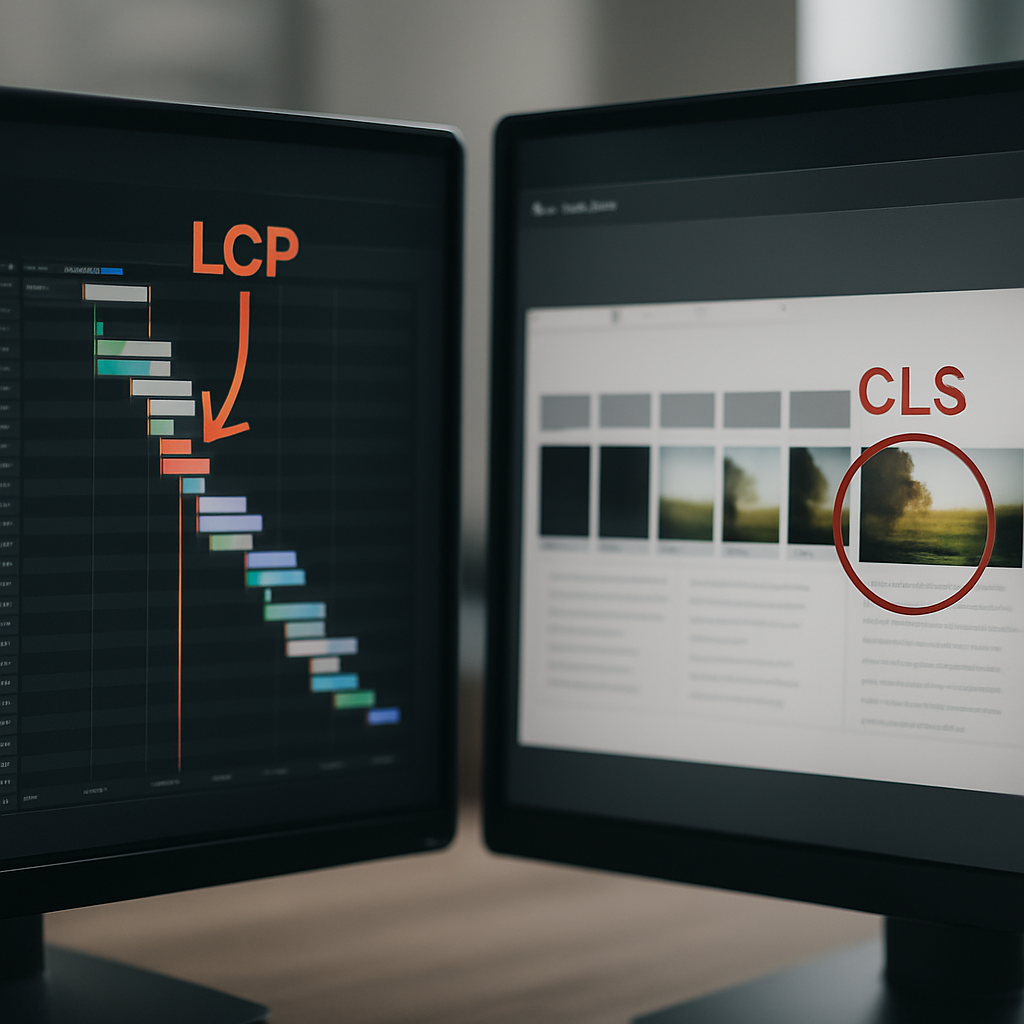
Next consideration: run the prioritized fixes as small, verifiable tickets, capture new CrUX snapshots for those pages, and watch both field metrics and GSC performance for acceptance criteria — if metrics do not improve within two release cycles, roll back and diagnose regressions.
6. On-page content quality, keyword mapping, and cannibalization
Core assertion: most stubborn ranking problems come from poor keyword-to-page mapping and uncontrolled cannibalization, not from missing metadata. If multiple pages compete for the same intent, Google hesitates and none of the pages gains authority.
Start by producing a single keyword-to-URL mapping CSV that joins Ranklytics keyword data with Google Search Console queries and your crawl inventory. Include columns for query, intent (transactional/informational/navigational), primaryurl, secondaryurls, impressions, clicks, and avg_position. That file is your source of truth for decisions—use it to spot clusters where several URLs share the same high-intent queries but none clearly owns them.
Triage rules to identify true cannibalization
- Flag as cannibalization: two or more pages each with >10% of impressions for the same query and average positions within five ranks of each other over 90 days.
- Prefer consolidation: if aggregated clicks would meaningfully improve CTR and the pages are thin or overlapping—merge into one authoritative page and 301 the rest.
- Prefer separation: if intent differs (for example one is a how-to and one is a product page) keep both but sharpen signals: unique H1s, distinct meta descriptions, and different schema.
Concrete example: a SaaS knowledge base had three posts all answering the same setup question; none ranked above position 8. We consolidated the best-performing draft into a hub, redirected the other two with 301s, merged unique examples into sections, and added an FAQ schema. Within six weeks the consolidated page rose to position 3 for target queries and captured most of the previous combined impressions.
How to execute consolidation (practical steps): choose the canonical URL based on backlinks, conversions, and content completeness; merge unique content into logical sections; set server-side 301 redirects for removed pages; update internal links to point to the canonical; set the canonical tag and submit the updated URL in Google Search Console for reindexing. Track impact in Ranklytics and GSC for at least 60 days.
Example H1 and meta for a hub rewrite: H1: Complete Guide to Setting Up X for Teams — Meta: Step-by-step setup, common errors, and examples to get X running for teams. Includes troubleshooting and template downloads. Target keywords: setup X guide, configure X for teams, X setup troubleshooting.
Trade-off and limitation: consolidation often causes short-term volatility. You will temporarily lose signals from the removed URLs until Google processes redirects and reassigns link equity. That is a normal cost; do not split content again immediately if rankings dip—monitor backlinks and organic clicks, and be ready to restore material if consolidated value is lower than expected.
Do the keyword-to-URL join first. Decisions made without seeing query-level overlap lead to wasted merges and lost long-tail traffic.
Final judgment: teams waste time tweaking on-page tags when mapping is the real problem. Invest an hour in a clean keyword-to-URL join and you will convert dozens of vague optimization tasks into a handful of high-impact consolidations or clarifications that engineering and content can execute with measurable outcomes. For reference on intent-driven ranking signals see Google Search Central.
7. Internal linking, site architecture and UX signals
Core point: internal links and site architecture are not cosmetic SEO work – they determine which pages get crawl budget, which pages accumulate authority, and how users discover high-converting content. Fixing a handful of internal-link paths often moves more organic traffic than dozens of title tag tweaks.
Practical insight: measure internal link equity, not link count. A link from a top-traffic homepage or pillar page carries far more weight than ten links from deep low-traffic pages. Build a simple score per URL such as internallinkscore = sum((referrerorganicclicks + referrerinternallinks) / referrer_depth) and use that to rank where you should add or remove links.
How to diagnose the problem fast
Run a focused audit that answers three questions: which pages are orphaned, which important pages are buried beyond four clicks, and which internal anchors use weak or irrelevant text. Use a crawl export with All Inlinks and combine it with your GSC clicks CSV to compute referrerorganicclicks per URL. If engineering prefers SQL, a simple join on URL between the crawl table and GSC exports produces actionable ranks quickly.
- Step 1: Export Screaming Frog All Inlinks CSV and the GSC Performance URL CSV for your baseline window.
- Step 2: Join on the URL, compute click-weighted inlink counts, and flag pages with low
internallinkscorebut high impressions or conversions. - Step 3: Identify high-value referrers – pages in the top 10 by organic clicks but not linking to priority pages – and prepare 3 to 5 contextual link opportunities per referrer.
Tradeoff to consider: adding links everywhere inflates navigation and creates noisy signals. Prioritize contextual links from thematic pillar pages and product landing pages rather than adding blanket footer links. Overlinking to conversion pages from irrelevant contexts damages UX and can reduce conversion quality.
Concrete application: on a SaaS site I audited, the pricing page had few internal referrers despite high conversion value. We added contextual links from four high-traffic blog posts and two docs pages with intent-relevant anchor text. Within six weeks the pricing page gained impressions for competitive buyer queries and improved conversions. The lift was measurable because we prioritized referrers by organic clicks and relevance, not by raw link count.
- Faceted nav caution: do not let crawlable facets create millions of indexable variants. Use parameter handling in GSC, canonicalization to the canonical listing, or
noindex,followfor facet pages you want crawled but not indexed. - Anchor text rules: prefer concise, intent-driven anchors – for example use the product name or core benefit rather than generic text like Learn more or Click here.
- Depth rule: keep business-critical pages within four clicks of the homepage or main pillar pages; deeper pages need explicit internal pathways from authoritative content.
noindex to faceted pages flagged by the crawl. 3) Surface orphan pages by placing them into relevant category templates or archiving if outdated. 4) Update sitemap to reflect canonical targets and submit in GSC.Most teams misread internal linking as a bulk task. The high-leverage moves are surgical: route link equity from a few high-traffic pages to a handful of conversion or authority pages and measure impact with Ranklytics keyword tracking and GSC impressions.

Next consideration: pick three priority pages, compute their internallinkscore, produce exact anchor text examples and PR descriptions, and open tickets that include the linking source URL, anchor copy, and expected rollout validation steps so you can measure changes in GSC and Ranklytics within two release cycles.
8. Backlink profile, toxic links and off-page diagnostics
Clear fact: backlinks still shift rankings, but the signal is noisy – the right link from an authoritative site outperforms dozens of low-quality mentions. Your audit must separate high-value links to reclaim or amplify from spammy links that create risk.
Backlink triage workflow
Practical steps: export a full backlink list from Ahrefs, Moz, or Majestic and reduce it to the columns you actually need – referring domain, referring URL, anchor text, first seen, last seen, and a domain-quality metric. Join that to your crawl inventory and GSC landing-page list so you can see which links point to pages that matter for organic traffic.
- Rank by impact: compute a simple score = referring domain quality * organic clicks of target page. Focus first on backlinks that score highest because those move the needle fastest.
- Manual review: inspect the landing page context for manipulative patterns – unrelated anchor, link farms, paid listings in footers, or comment spam. Automated spam scores help but do not replace a human check.
- Decide action: mark each link Keep, Contact owner, or Disavow. Use outreach for high-value targets and disavow as a last resort after failed removal attempts or when a manual action exists.
Limitation and tradeoff: disavow files are blunt instruments. They do not speed index changes and they can slow recovery if you disavow links that actually contributed ranking signals. Use disavow only after documentation, attempts at removal, and when the link profile shows a pattern of spam or a manual penalty exists.
| Action | Trigger |
|---|---|
| Keep | Referring domain quality is high and link context is relevant |
| Contact owner | High-value domain with recoverable placement or obvious editorial contact |
| Disavow | Repeated spammy links, removal attempts failed, or manual action correlated with toxic links |
Concrete example: during a mid-market SaaS audit I matched Ahrefs backlinks to the keyword drop window and found three lost citations from two review sites that previously drove branded rankings. Outreach recovered one link and we reclaimed a featured snippet position within three weeks. The lesson – start with correlation to lost links, then prioritize outreach for the highest-impact referrers before considering a disavow.
Disavow file format example: start the file with comments and list domains or exact URLs on their own lines. For example: # Disavow submitted 2026-03-15 then domain:spamdomain.example or https://spamdomain.example/badpage. Save as disavow.txt and upload via Google Search Console – see Google Search Central for details.
Triage worksheet columns to use: Source URL, Referring Domain, Anchor Text, Target URL, Domain Quality (DR/DA), First Seen, Last Seen, Traffic Estimate, Action, Outreach Status, Notes. Keep this CSV as the single source of truth and export versions before and after outreach for your seo audit report.
Judgment most teams miss: teams focus on volume of toxic links instead of where those links point. A handful of toxic links to low-value pages rarely matters. Invest time mapping backlinks to your priority pages and only escalate backlinks that target pages with measurable traffic or conversion value tracked in Ranklytics and GSC.
9. Prioritize fixes, assign tasks, and measure impact
Prioritization decides whether an audit produces ranking improvements or a long to-do list. Score each finding by the expected business outcome it can move, not by how noisy or technically interesting it is.
Scoring that leads to decisions
Use a simple weighted score you can calculate in a spreadsheet. For example: **Impact Score = (Traffic Exposure 0.5) + (Conversion Value 0.3) + (Feature Upside * 0.2). Then compute Priority = Impact Score / Estimated Effort (hours)**. Treat Traffic Exposure as recent organic clicks or impressions from GSC; Conversion Value is revenue or lead-rate for that page; Feature Upside is a small ordinal value for things like rich snippet return or preventing indexation loss. This forces trade-offs between big wins that take time and many small, cheap tasks.
- Quick triage: mark each issue P0/P1/P2 where P0 = critical indexability or security, P1 = high-impact content or performance, P2 = nice-to-have UI or meta tweaks.
- Estimate effort: use three buckets: small (<=4h), medium (1-3 days), large (>3 days / requires cross-team planning). Ask an engineer for a rough estimate before scoring.
- Batch small fixes: group many small front-end changes into one deploy per template to reduce context switching and testing overhead.
- Owner and SLAs: assign an owner (engineering/content/SEO) and set an SLA: P0 = 48 hours, P1 = 2 weeks, P2 = next quarterly sprint backlog.
Trade-off to accept: optimizing only low-effort tasks inflates velocity but rarely moves rankings. Conversely, overcommitting engineering to a massive refactor delays dozens of high-value quick wins. Use the Priority formula to balance both.
Concrete ticket template you can copy
Create tickets that are verifiable and actionable. Include these fields in each ticket so reviewers and QA can validate without back-and-forth.
- Title: clear short description (for example: Fix canonical tags on /blog/* to HTTPS).
- Type / Component: technical/content/frontend.
- Priority: P0/P1/P2.
- Description: root cause, affected URL samples, and where it appears in the audit (attach exports).
- Reproduction steps: exact steps, and
curl -Ior Screaming Frog export references. - Expected outcome: measurable acceptance criteria (for example: LCP <= 2.5s on /pricing, or GSC impressions for /product up 20% vs baseline).
- Rollout & validation: checklist with GSC URL Inspection, Ranklytics keyword watchlist, GA4 event to track conversions, and server-log check.
- Estimate (hours): owner and test account or staging link.
Concrete example: We triaged a product-listing LCP regression as P1 because monthly organic clicks were high and conversion rate was above site median. The ticket asked engineering to defer a noncritical analytics script and preload the hero image; acceptance criteria were an LCP drop of at least 0.8s in synthetic tests and a 10% click increase on that landing card in Ranklytics within 30 days. Work estimated: 6 hours; rollout verified in staging, deployed, and monitored — results tracked in Ranklytics and GSC.
Measurement reality: Google Search Console is delayed and noisy; do not rely on GSC as the only short-term signal. Use Ranklytics keyword velocity, synthetic Lighthouse runs, and server logs as leading indicators. Reserve GSC and GA4 for the 30/60/90-day acceptance window.
Measure before you change and define a clear acceptance criterion. If you cannot state what success looks like in a single sentence, the ticket is not ready.

Written by
ranklytics